Ho to use Ninja Ripper
![]() Русский /
Русский / ![]() English
English
Official support page on cgig.ru/forum
[Updated 05 Feb 2017: Chrome ripping supported]
This article describes how to «rip» 3d models, shaders and textures out of the games using as an API directx 6, 7, 8, 9, 10, 11 versions for both 64 and 32 bit and import ripped models/textures into 3DS Max, Noesis or Blender.
Attention: ripper not (and will not) support ripping models with ingame positions how it works in 3D Ripped DX.
Note: The article is designed for expirienced 3ds Max users and doesn’t cover detail things such as, for example, texturing objects, setting up materials, etc.
For the conversion process, we need the following tools:
- 3ds Max (I’m using 2009 х86) should work on versions 2009+
- Ninja Ripper v1.6.0 (ripper itself) Author: blackninja [page]
- GIMS Evo Importer (3ds max import script) Author: 3Doomer [page]
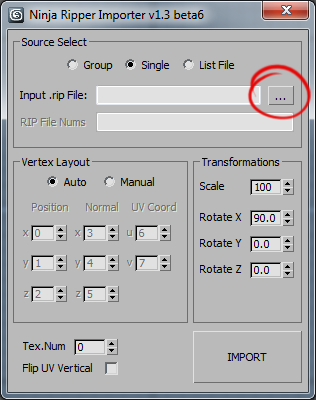
- [not necessarily] ninja_importer v1.3 (3ds max script) Author: blackninja [download]
- [not necessarily] Noesis v4+ (3d model viewer/converter) Author: Rich W. [page]
- [not necessarily] Blender v2.49b (3d modeling software) Author: Blender Foundation [download]
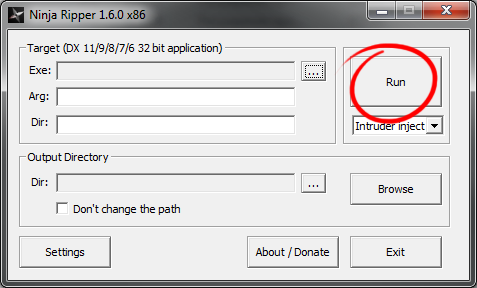
1. Setting up the ripper. Unpack the archive to any folder. Run the program:
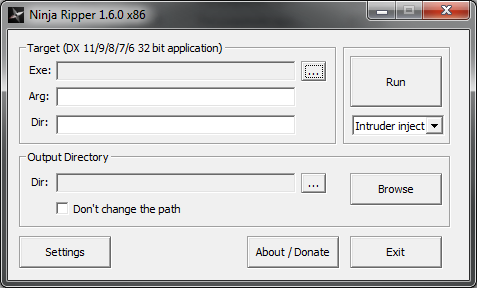
Here’s all ripper features
- Extracting all available vertex information of the models (position, all the texture coordinates, normals, weights, BLENDWEIGHT, BLENDINDICES, BINORMAL, TANGENT), indices, textures, shaders. Theoretically all extracted information could be import into the 3D editor!
- Support for D3D11, D3D9, D3D8 (processed, however not all methods/techniques, but should work for 95% of all games).
- Target (DX11, DX9, DX8, DX7, DX6, DDRAW 32/64 bit application):
- Exe — field for direct path for the executable file of the application/game;
- Arg — field for additional settings for executable file;
- Dir — field for direct path to the folder which contains executable file (filled automatically when you select .exe, no need to change by default);
- Intruder Inject — mode in which the ripper will try to run .exe of the application/game directly, using for ripping only intruder.dll, if this mode doesn’t work (do not rip or even response) then you need to select one of the wrapper modes;
- wrapper modes — modes in which ripper will copy d3dX.dll in to the folder containing the executable file of the application/game, after this ripper windows can be closed (not for the firefox rip though), then you can start the game from any location, copied d3dX.dll will automatically hooks the render in the game. Thus no longer need to run the ripper itself for this game. Here are the available wrapper modes:
- D3D8 Wrapper — for directx8 games only;
- D3D9 Wrapper — for directx9 games only;
- D3D11 Wrapper — for directx11 games only;
- DDRAW Wrapper — for directx 6/7 games only;
Note: you need to delete .dll from the game folder manually (in case you want to use Intruder Inject mode), ripper configurations is stored in the registry.
- RUN — button to start the application/game
- Output Directory:
- Dir — field for output folder (filled automatically). This folder can be changed manually, be sure that checkbox «Don’t change the path» is cheked;
- Browse — button to explore folder with selected .exe file;
- Don’t change the path — uncheked atumaticaly filled with the path to selected executable;
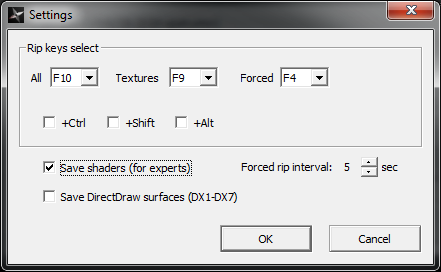
- Settings button:
- Rip Hotkeys — you can change rip buttons here:
- All — rip textures and 3d models;
- Textures — rip only textures;
- Forced — rip with time interval (for 3 seconds y default);
- also you can alternatively use Alt, Ctrl or Shift with those hotkeys;
- Save Shaders (for experts) — activating this will forced save of the haders (sometimes does not allow to run the game);
- Forсed Rip Interval [X] second — as it said;
- Save DirectDraw Surfaces (DX-DX7) — texture/sprites, mostly fair for 95-99 years games;
- Rip Hotkeys — you can change rip buttons here:
- About/Donate button — if you like this tool and want new features to be added to it please support developers!
- Exit button — closes ripper.
Select the game you want to «rip». In the Ripper window click the button ‘…’ to select .exe of the game.
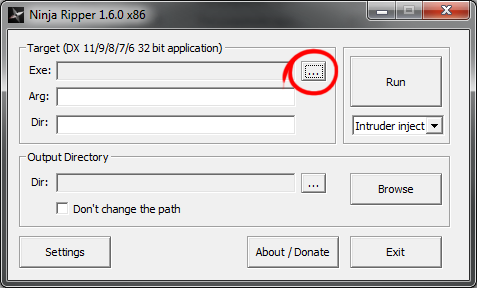
Note: You can add game’s .exe by drag-and-drop from explorer window to the ripper window
Choose the mode in which the ripring process of the game will be produced. Mode depends on directx version which game runs on. See modes description:
- Intruder Inject — mode in which the ripper will try to run .exe of the application/game directly, using for ripping only intruder.dll, if this mode doesn’t work (do not rip or even response) then you need to select one of the wrapper modes;
- wrapper modes — modes in which ripper will copy d3dX.dll in to the folder containing the executable file of the application/game, after this ripper windows can be closed (not for the firefox rip though), then you can start the game from any location, copied d3dX.dll will automatically hooks the render in the game. Thus no longer need to run the ripper itself for this game. Here are the available wrapper modes:
- D3D8 Wrapper — for directx8 games only;
- D3D9 Wrapper — for directx9 games only;
- D3D11 Wrapper — for directx11 games only;
- DDRAW Wrapper — for directx 6/7 games only;

Note: you need to delete .dll from the game folder manually (in case you want to use Intruder Inject mode), ripper configurations is stored in the registry
Start the game by pressing the Run button:
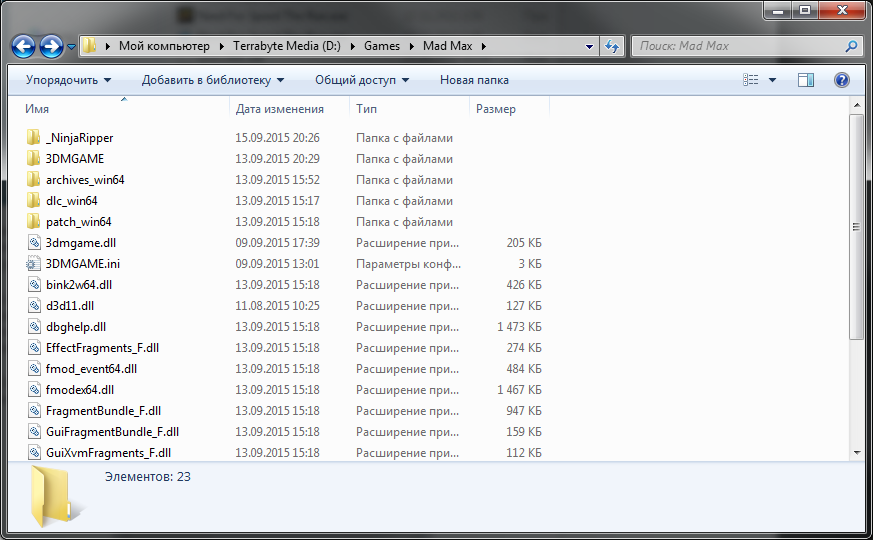
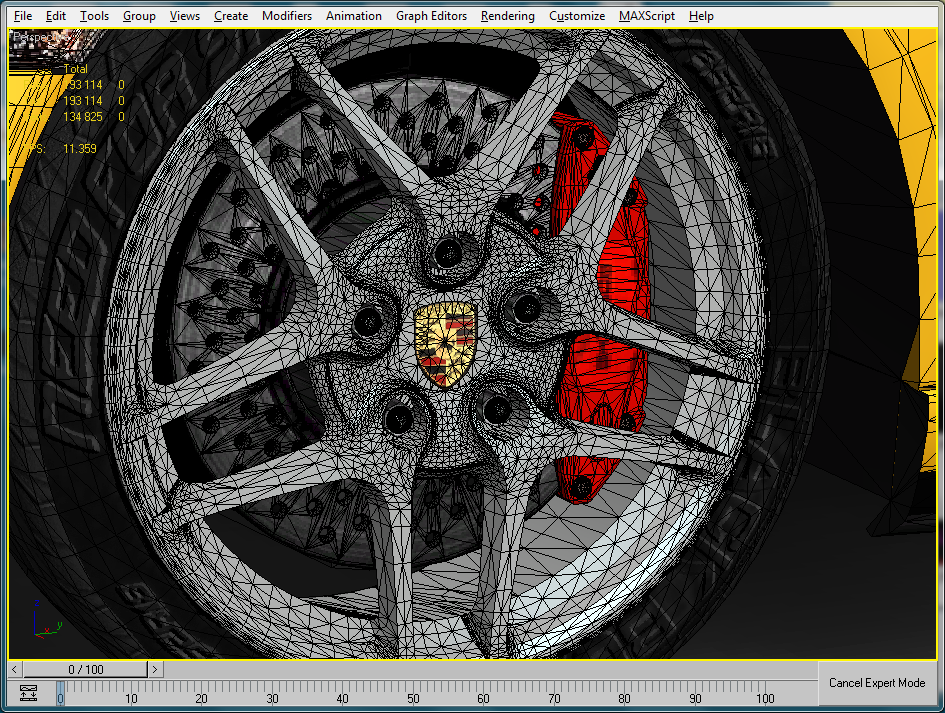
2. Game rip process. After game is started the folde _NinjaRipper will be created near the application exe. In game choose the desired location and click the «rip» button (F10 by default). After pressing F10 the game will «freeze» for a second or so, then it will run for a bit and «freeze» again for about 5-25 seconds. Duration of ripping process depends on complexity of the game and the computer capacity. During the ripping process all the ripped resources will be storing inside the <game EXE folder>\_NinjaRipper\ folder. 3d model format is .rip, texture format is .dds.
Press Textures rip button (F9 by default) to rip the textures only. Press Forced rip button to rip for a period of a seconds — it’s important for ripping web sites (ex: WebGl) with 3d models. Firefox and Chrome is officially supported only. I should mention that normaly after ripping process is over the game will be unfreezed and you can continue it from the same point. However there’re many games which continue runnig during ripping process or games which screen will dimmed after ripping process so you can hear the game but can’t see it.
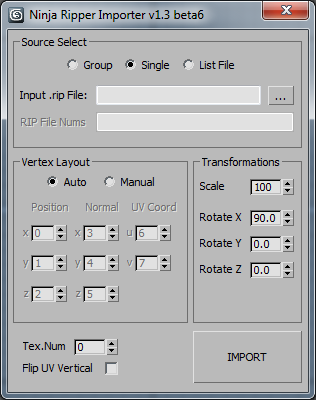
3. Importing models into 3ds max. There’s a 2 versions of .rip import script for 3ds max:
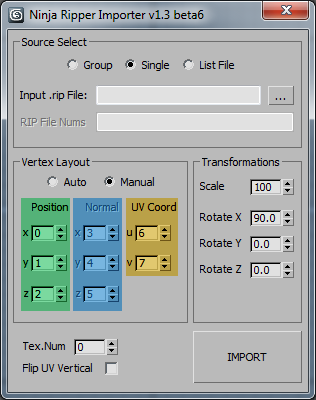
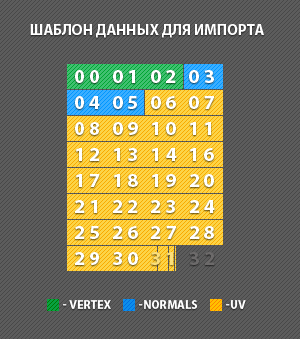
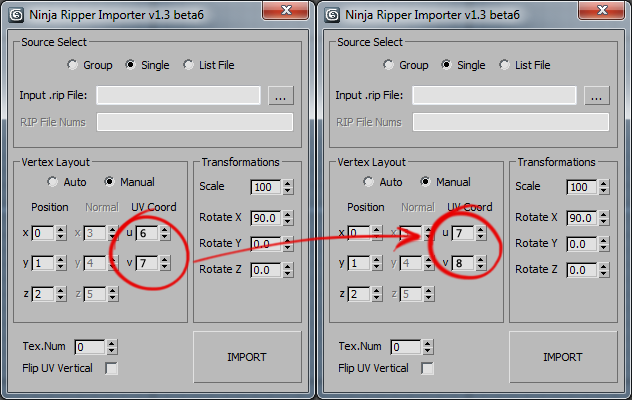
- first one (further: old) script was written by the ripper’s author and have standart functions. Its only issue is getting uv coords out of .rip files;
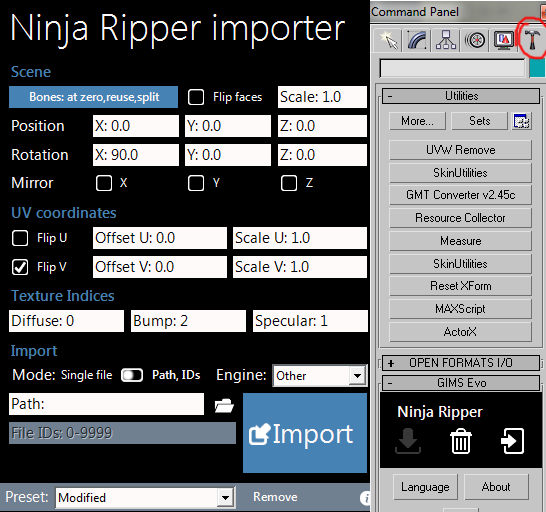
- second (further: new) script — GIMS Evo — has a lot of various functions. One of its important feature is importing vertex weights and bone creating in «right» position in the scene. I recomend using this script. New version of its web installer can always be downloaded here.
This is how main window of GIMS Evo looks:
How to install this script:
- Extract «scripts» folder into the 3D MAX directory with files replacement.
- Extract «GIMS» folder with files replacement into:
- Windows Vista/7/8: «<DRIVE>:\Users\<USER_NAME>\AppData\Local\»
- Windows 2K/XP: «<DRIVE>:\Documents and Settings\<USER_NAME>\Application Data\»
- If you have some errors with GIMS Evo loading, run that script to get the installation path:
- dl.dropbox.com/u/18649105/GIMS/ShowEGIMSPath.ms
- Start 3D MAX, check your internet connection, and install GIMS from the Utilities tab
Scene section:
- Bones — choose to or not calculate bones along with the Skin modifier and weights on imported meshes :
- Don’t create — bones and weights will be skipped on import;
- Create at zero — bones will be created at mesh pivot center also Skin modifier will be created on the mesh;
- Create at calculated position — bones will be created at calculated positions and Skin modifier will be created on the mesh;
- Reuse scene bones — existing in the scene bones will be reused with the new imported bones;
- Split the mesh by skinning when possible — as it says the mesh could be splitted by the mesh skinning properties;
- Flip Faces — check to flip polygons of the imported meshes;
- Scale — setup imported meshes scale;
- Position — setup XYZ position of the imported meshes;
- Rotation — setup XYZ rotation of the imported meshes;
- Miror — reflect imported meshes by XYZ;
UV coordinates section:
- Flip U — flips UV coordinates by U;
- Flip V — flips UV coordinates by V;
- Offset U/V — setup U or V offset ;
- Scale U/V — setup U or V scale;
Texture Indices section. Look at the texture’s ID which is related to the imported mesh. For example Tex_0001_0.dds defined by the number before «.dds» is usually used as diffuse texture:
- Diffuse — define which texture will be used for diffuse slot map by ID;
- Bump — define which texture will be used for bump slot map by ID;
- Specular — define which texture will be used for specular slot map by ID;
Import section is for settings of the mesh import:
- Mode — choose to import single or group of files;
- Engine — use specific engine for meshes to import. Use Other engine for all the games. However you can use the following engines: Frostbite 2, Frostbite 3, Frostbite 3.5, YETI engine;
- Path — path to the folders with rip files and textures. Press folder icon to change;
- File IDs — enter the mesh number to import. Could be the following input format: «0-15, 589, 67» or just «1» (without quotes);
- Import — button to start Import;
Preset section at the bottom of the window:
- Drop-down list with the name of the preset — you can select/save preset of the importer settings;
- Remove — removes selected preset;
- (i) — importer information button.
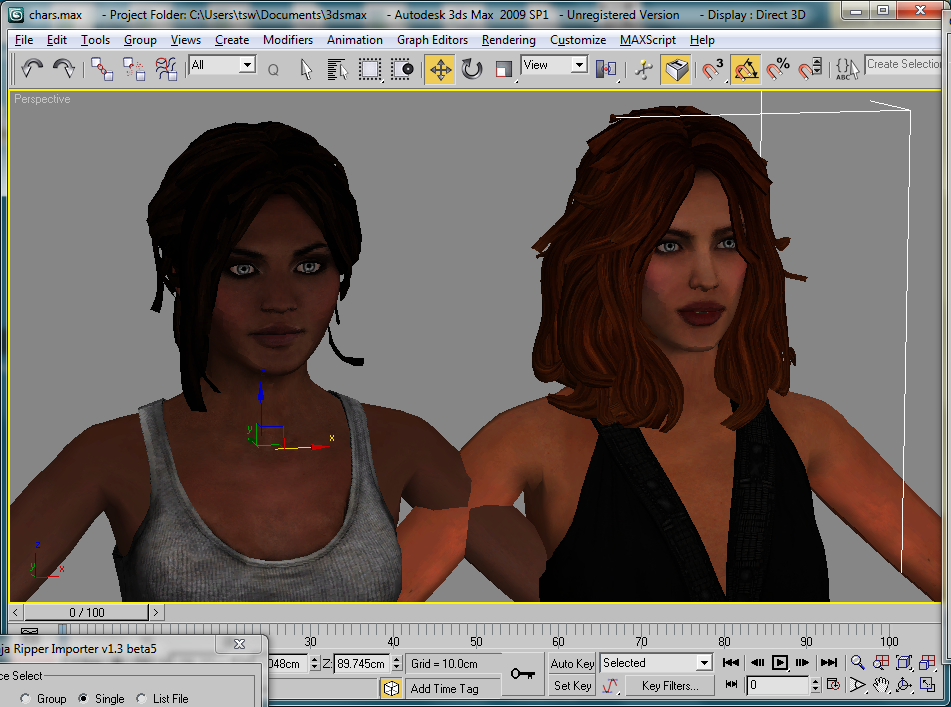
To import .rip models into 3ds max choose Import Mode, path to the files and press Import button. All the possible uv ccords will be loaded on the model automatically into separate uv channels if there’s more than 1 uv set.
Note: If files imoported into 3ds max (models/textures) will be to many than 3ds max will crash. So choose and import exactly what ever you wanna work with by looking in texture names.
Ripped models (sometimes textures) can be also loaded into Blender or Noesis tools.
- use this python script to import models into Blender (by Akaito);
- script for Noesis is in the NinjaRipper archive;
4. About textures. Textures are always .dds files. They are automatically loaded into 3ds max for most of the time. It should be noted that each model corresponds several textures, for example a model Mesh_0000.rip can have multiple textures with names Tex_0000_1.dds, Tex_0000_2.dds, Tex_0000_3.dds etc. But you can only load one of these textures in 3ds max. What is the texture will be loaded is selecting in the importer by changing number in Texture Indices function.
Note: If you’re using a program for generating «preview» for .dds files in Windows explorer (I use Mystic Thumbs) then when ripping dx11 games the mini-preview for such .dds will not be shown, because they have wrong file header, the problem is not solved yet. However you can edit/view those dx11 .dds files in photoshop/irfanview/etc.
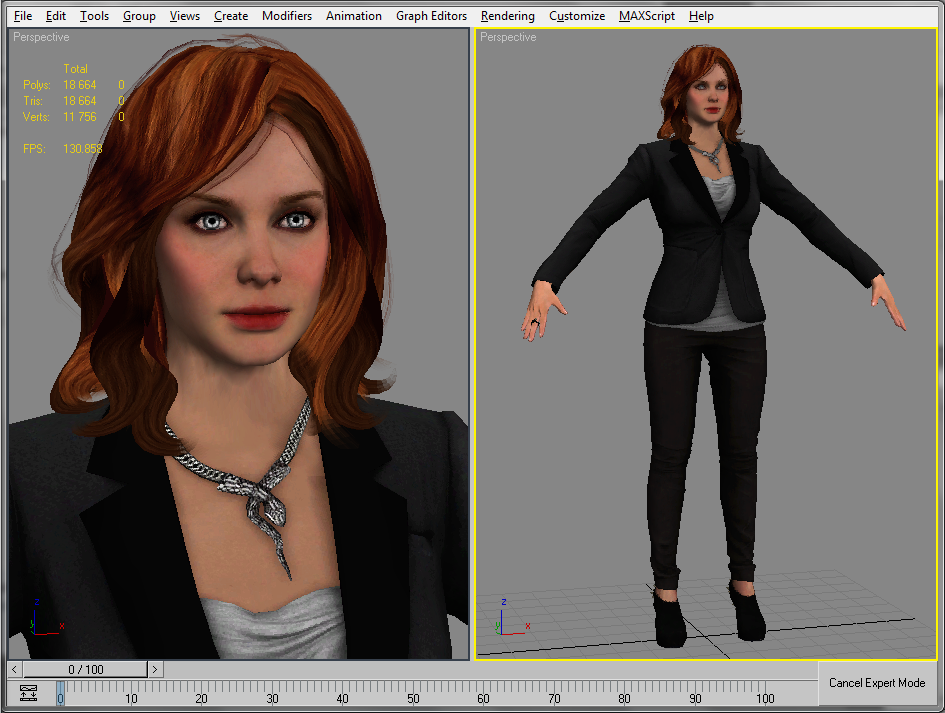
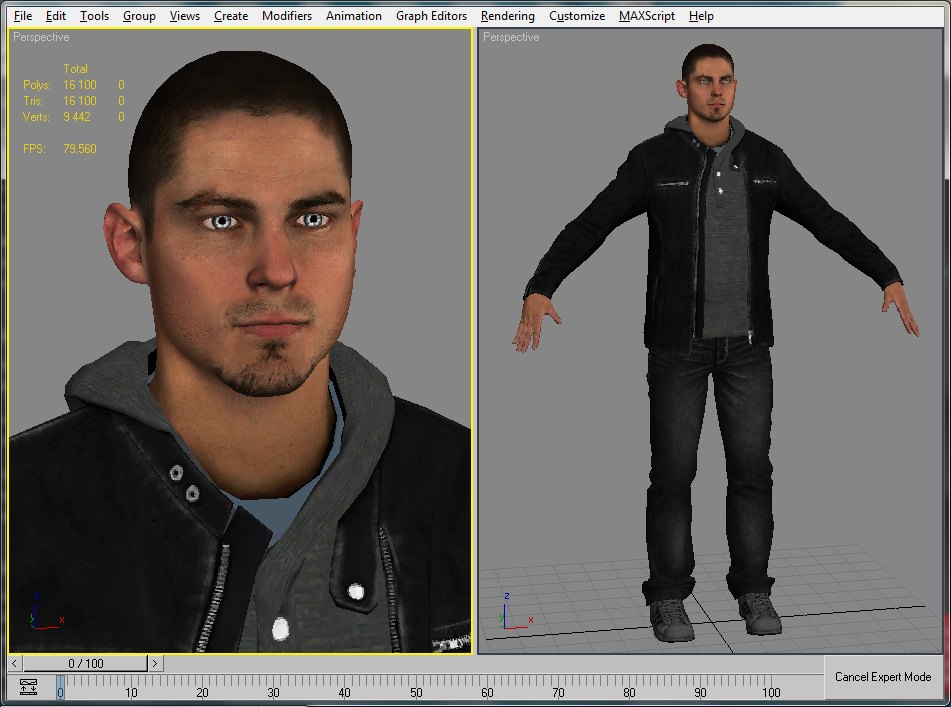
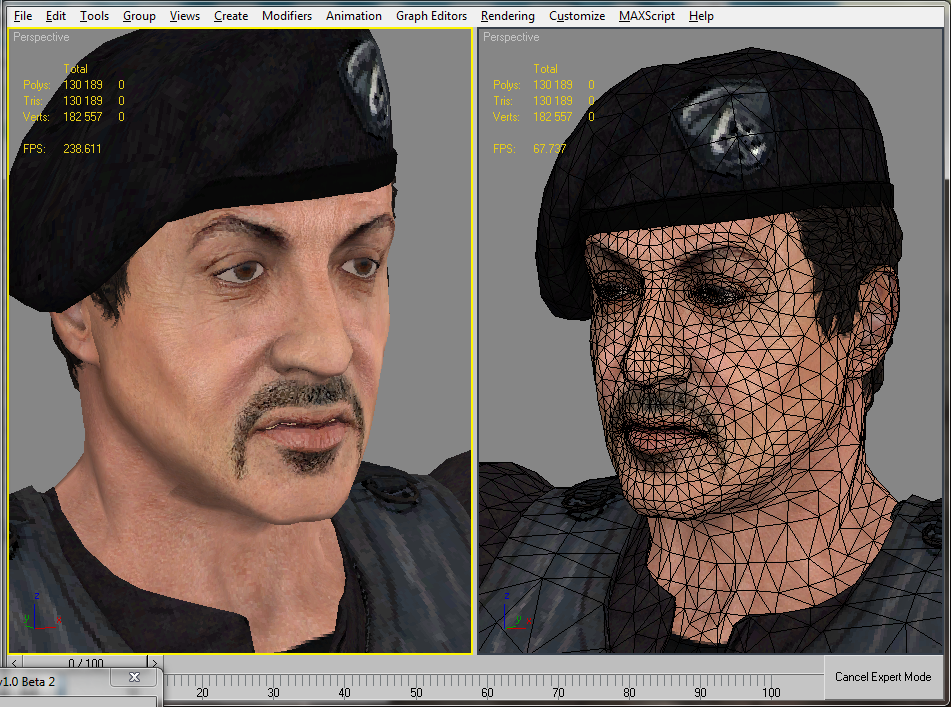
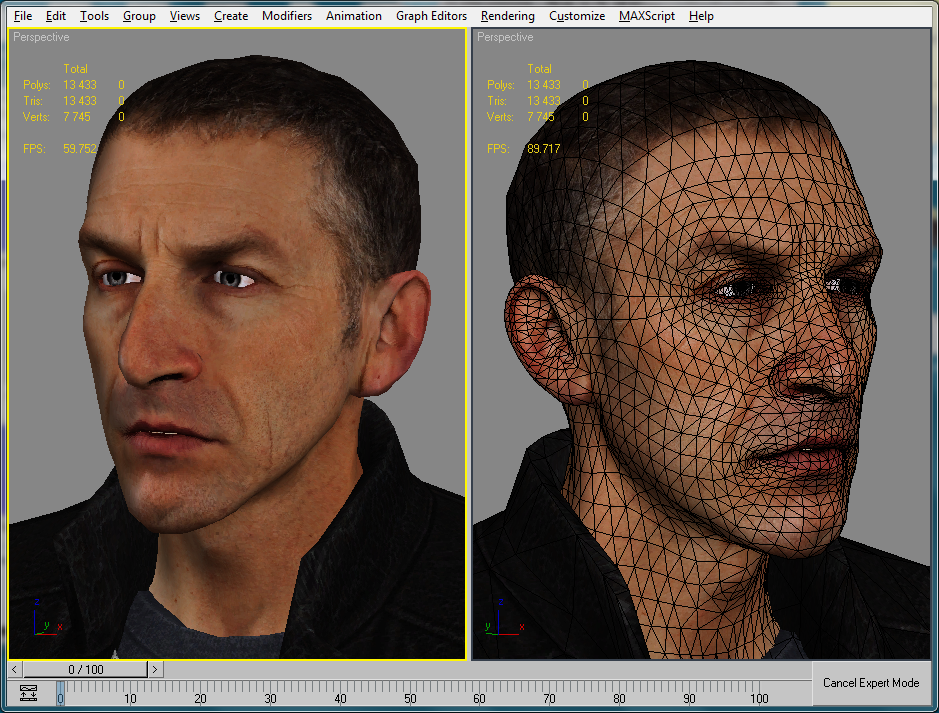
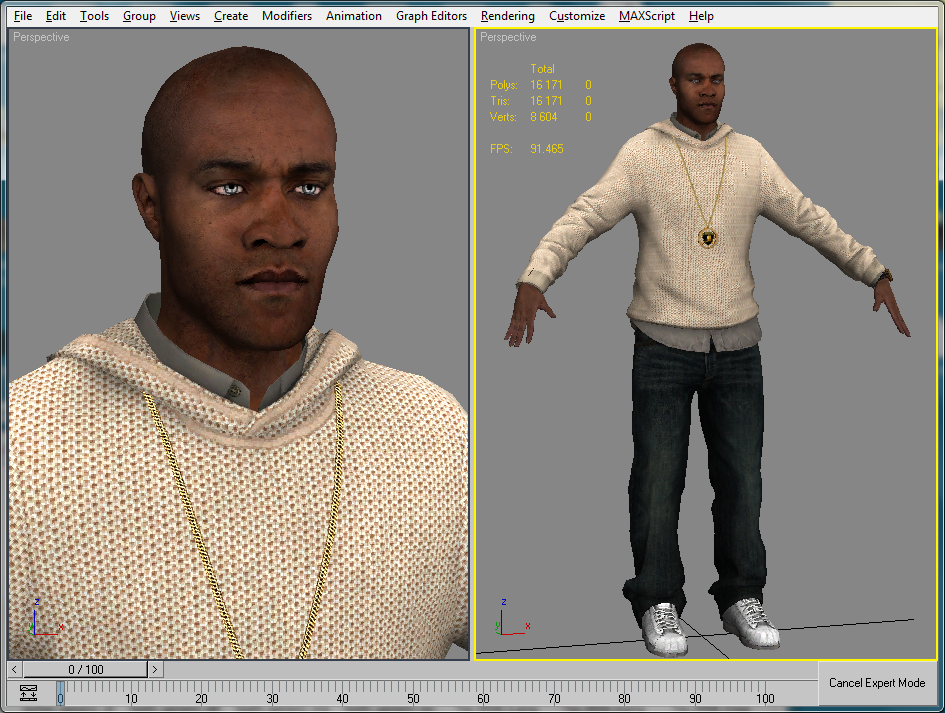
5. Results. Here’s some results of the game’s rips Battlefield: Bad Company 2, Battlefield 3, NFS: Run, Expendables 2:

367 thoughts on “Ho to use Ninja Ripper”
How to rip GTA V PC car models ?
xkamen, what problem do you have?
I need help I’m trying to rip the model Kingsley the fox from Kingsley adventure on psx kid there any way to rip psx (pd1) models? Due to this game was never remade I’m doing pretty much everything I can to get the in game modeld.
Hi
Thank you for the ripper !
It worked well on Guild Wars 2 🙂
But i don»t succeed in ripping my characters from SWTOR.
I use the x86 Ninjaripper 1.5.1 with the inject mode on «Intruder inject»
for Rip keys:
All F10
Textures F9
Forced F4
«Forced rip interval» set to 5 sec
Like said on XeNTaX forum but it doesn’t work :/
I have 3DS Max 2014, will I still be able to open the models?
Btw, how do I add the ninja_importer v1.3 (3ds max import script) to 3DS Max?
Yes, you can open this models.
Jack, to run maxscript see this video:
https://youtu.be/7tBLomEvKGM?t=73 (from 1:13)
p.s.: also if you don’t understand phrase «Open 3ds max. Menu MAXScript > Run Script… choose a script ninja_importer.ms» maybe you should learn 3ds max a bit first.
Hello.
Thank you for amazing software, it works great.
I have been trying to make it work for the last offline v1.2 installer of NFS World created by the following team here
https://sites.google.com/site/djnfswo/Downloads
and I have tried all possible combination, it just wont work, nothing gets ripped not even a log is exported.
Can you please take a look and tell me what needs to be done?
And also, ripping first time NFS Most Wanted from 2005 anywhere on the free roam, all models where imported in 3dsMAX same way they where in the game in the 3d space, trying second and third and so forth, they no longer loaded correctly with proper coordinates in 3d space, they all end up in the center thus making a mess, any idea as to why or what needs to be done? maybe I missed something?
Thank you.
cheers
Is there a possible way which i can rip the model along with its animations and bones? plz reply asap
@William,
Unfortunately ripping animations and bones is not possible, yet.
When I hit the rip button, does it rip all models or just the ones in the vicinity of the player?
Carl, ripper rips all the models rendered at the moment of rip — basically everything what is on screen.
Hello,
when I rip a scene from Lego Pirates of The Caribbeans I get a bunch of .rip files.
when I import them in 3DS I get all the models in the center of the screen, how can I import them in the right position?
thank you
Cristian, you can’t! «t-pose» works for everything including the object position not only transformation. there’s no solution (or it’s very expensive) which help you to choose which model should be ripped in t-pose and which is not.
so for «like ingame position rip» use 3D Ripper DX.
thank you Tosyk, but 3D Ripper DX support Direct3D only to version 9, not 11.. 🙁
Cristian, well in this case we all (who doesn’t know coding) can only pray that someone convert models or get all your patience and put models in t-pose by yourself.
What do we «THE USERS» have to do in order for NinjaRipper to support same function as 3D RIpper to support every geometry in the scene where its at in 3d space, not all centered in the middle, what can we all do?
What would the steps be, donations? or?
Because it would be great to have full support on all Direct X games regardless of version or game out there.
I know it takes a lot of work, but I also know its doable, so what do we really nee dot do in order to motivate the dev person/team?
Donate? Donate games as gift in either steam or origin? etc?
let us know somehow, the more that join the better
I am trying to use this program to grab models from Google Earth application. I came upon the idea after stumbling into this article. http://brian-horning.com/google-earth-to-3ds-using-3d-ripper-dx/ In the example they use 3D Ripper DX and I saw that program was very outdated. I then searched for another and found Ninja Ripper. I tried to run Google Earth but only get errors. When trying specific wrappers it says «Wrapper copy error. Check that copy directory is writable» When I try Intruder Inject I get «CreateProcess() error. Win32 error code: 0x000002e4» Any ideas on how to make this work? I have made sure Google Earth Runs in direct x mode (Which is a option under Tools\Options in the application). Any feedback will be much appreciated.
I am also up for the idea of funding dev progress by monetary or gifting means.
Thanks,
Dave
@ Dave
That error means you didn’t run it with admin rights, thus cant copy the specified wrapper where Google earth is installed.