3ds Max Visualization with shaders
![]() Русский /
Русский / ![]() English
English
I this article i will describe a process of applying/setting/features of DirectX Shader of 3ds Max.
Note: The article is designed for users familiar with working in 3ds Max and does not cover such things as, for example, texturing objects, setting up materials, etc.
In this article I have used tools:
- 3ds Max (i use 2008 х64) should work on versions: 7-2011
- Xoliulshader v1.6 (shader for 3ds Max) Author: Laurens Corijn [download] [page]
1. The entry can be skipped. Quality of the graphics (textures, and the number of polygons in the models) in the modern games have already reached such a level that almost does not need additional tools to improve the image, such as shaders, but for the “juiciness” pictures shaders still needed. And in such an application is admissible as 3ds Max continues to qualitative visualization require adjustment of the external / internal renderer. Picture is excellent, but non-interactive, to help achieve interactivity with minimal loss in quality comes shaders. In fact shaders are deceiving us, making believe that what we see: the shadows, reflections, glare, it’s all actually real, but it is not (of course in contrast of visualization, which calculates the most of the conditions when rendering)! Shaders are automatically “draw”for us a flat picture, seeming real! They have to do it, just so organized and can be different: a shader for water, or shader for human skin, or a shader for the cue ball.
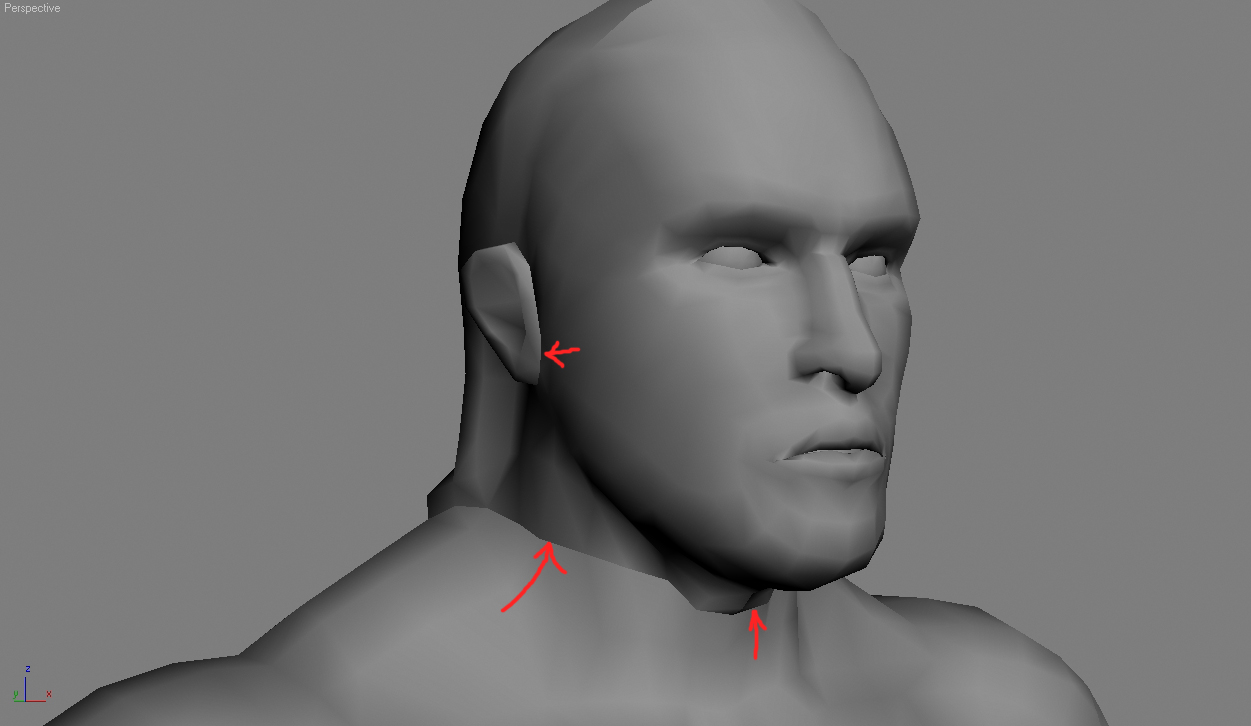
2. Setting up a model. To better display the model with the shading, I recommend to remove all the seams on it. These seams:

To do this, select the object in 3ds Max, create new script (MAXScript -> New script). In the window that appears (MAXScript Editor) insert this script (only for objects with a skeleton with a Skin modifier):
for obj in selection do
(
$.modifiers[#Skin].mirrorEnabled = off
modPanel.setCurrentObject $.baseObject
modPanel.addModToSelection (Edit_Normals ()) ui:on –Add Edit Normals Modifier under the Skin Modifier
actionMan.executeAction 0 “40021” — Selection: Select All
$.modifiers[#Edit_Normals].EditNormalsMod.Average useThresh:on threshold:0.01 –Average selected by 0.01
modPanel.setCurrentObject $.modifiers[#Edit_Normals] –Select Edit Normals Modifier
maxOps.CollapseNodeTo $ 2 off –Collapse Edit Normals Modifier
)
Before running the script make sure that the Modify panel is activated, simply click on it: Next in MAXScript Editor evaluate it (Evaluate All or Ctrl+E). After a short process the selected object will look like this:
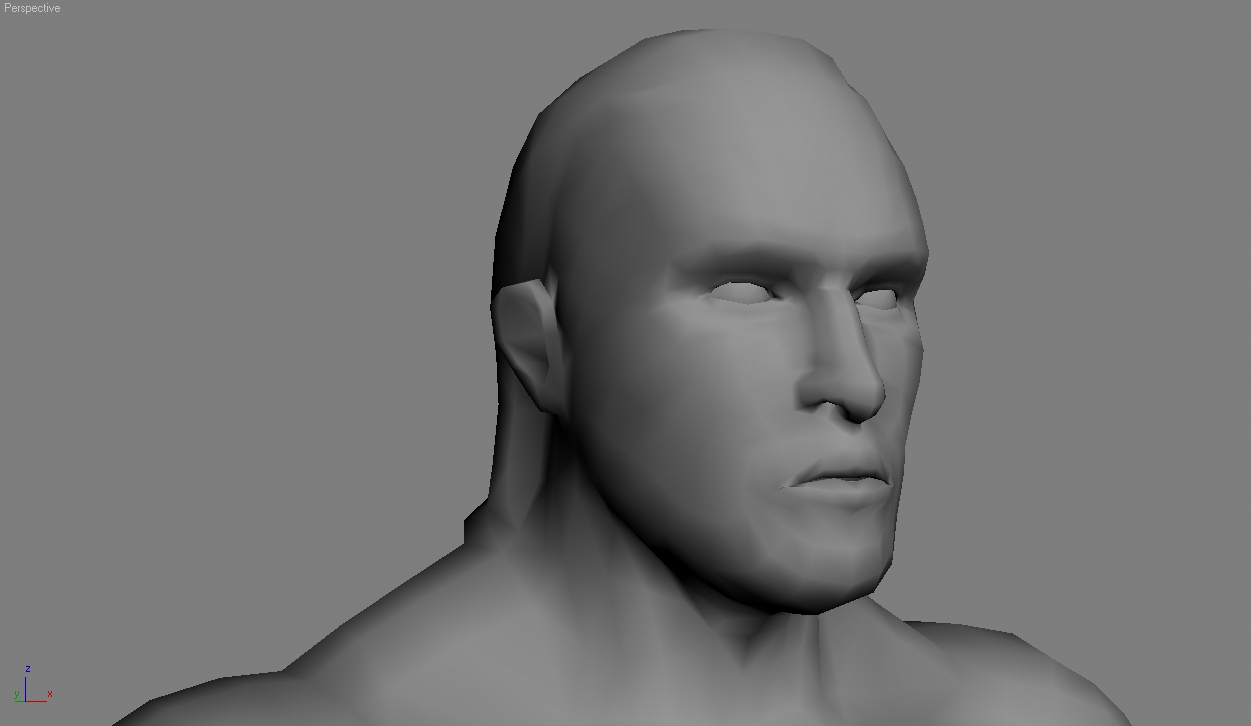
Note: For objects without Skin modifier and bones you need to add Edit Normals modifier, in it in the section Average check the Use threshold checkbox, set the parameter to 0.01, select all normal and click on Selected button.
3. Setting the shader. Download the archive with the Xoliulshader. Extract the contents of Xoliulshader_v1.6.rar in the folder:
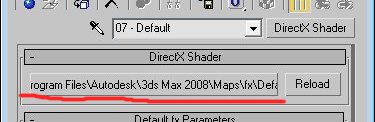
<install path>\Autodesk\3ds Max 2008\maps\fx\
В 3ds Max open Material editor. In a free slot add DirectX Shader (rosy ball). In this material, click on the underlined button:
 and choose Xoliulshader_1.6_noshadows.fx (works on most systems).
4. Setting the shader. Set up only the most important:

- Shader Hue Adjusment – affects the “redness” of an object, we need primarily for the skin, the epidermis imitates, I put 0.3-1.1
- Half Lambert Shading – controls the strength of lightening shadow, I put 1,2-1,8
- Diffuse Map – primary diffuse texture (color)
- Spec Map – texture (low chroma) is responsible for the highlights on the model, the values range from 0.02 to 0.5, if there is no such texture (often with an index _spec/_sp/_s at the end of the file name), then just put on a maximum Glossiness Level and reduce Specular Global Level to 0.08
- Normal Map – parameter responsible for the bumping of the texture and need to be blue-purple color (standard of the nvidia). There is an important parameter Flip Green – on/off as needed, depending from the obtained results. The difference is very noticeable on the face!
- Use Fresnel Reflections – reflection of the light environment on the object. Very important parameter, after enabling and configuring it seems that the object is inscribed in the environment
- Fresnel Power и Fresnel Muliplier – setting the strength and depth of the Use Fresnel Reflections parameter mostly never changes, but you can configure it a bit
- Reflection Map – texture (black & white) indicates the shader in the which places will be reflected (white places), and in which no (black places). Configuring if there is a reflection texture
- Cubemap – important texture giving the light, color and reflection of the environment, you can download it from [here]
- Cubemap Blur – blur environment
5. Visualization. 3ds Max and shaders.
2 thoughts on “3ds Max Visualization with shaders”
I am also a huge fan of FBO debug by displaying them at sceern corners. One day, that was not enough, so I ended up writting my FBO data into HDR image (to keep floating point precision). Then, I was able to read pixels values in photoshop. 🙂
Nadia, what FBO means?